Application Using Main Window
Create a MainWindow based application using the designer.
SpreadSheet (Functionality)
Context
In the lecture on QMainWindow, we wrote the code for the graphical and set of actions for our main SpreadSeet application. Now we will focus on writing a set of basic functionality.
For the full Fonctionality, you’ll need a deep understanding on inheritance and
- QTableSelectedRange
- Sorting using keys.
- Introducing a formula for each Cell ( you must use Inheritance to specialize a QTalbeWidget).
Those concepts are out of the scope of this course and will much of a lost of time. But for the curious programmer, they could try to achieve the full functionality.
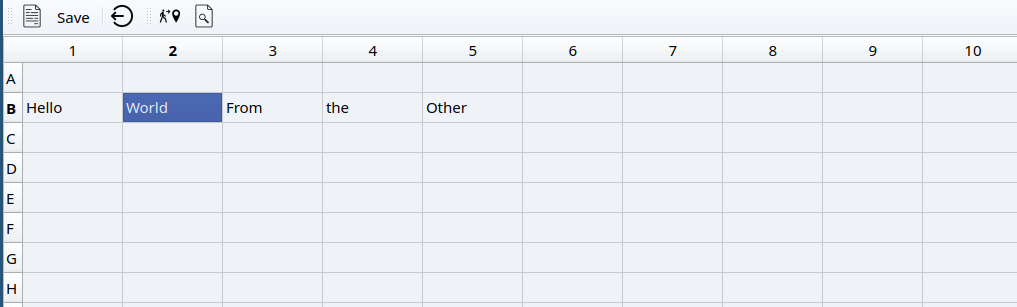
In the our last iteration of the SpreadSheet we did obtain an application with:
- Menu Bar
- Two tools bars
- Status bar to print the informations
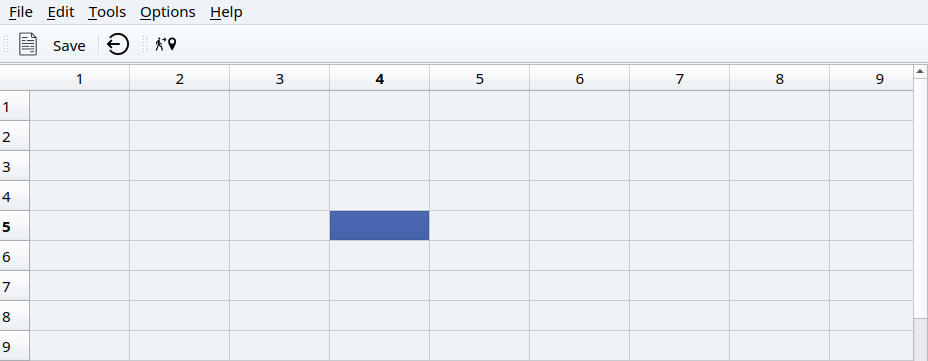
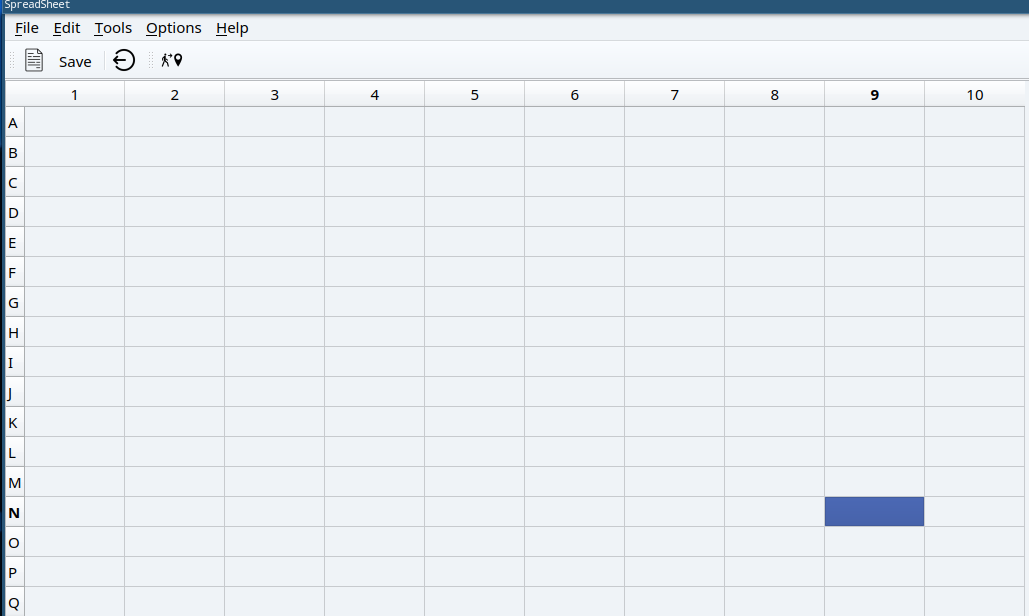
You should have an application that looks like that :
If you missed or have a problem with the previous week, Here is the link for the application (Preferably you should work with your own version to have a feeling of completion!).
Here is the Starter_code.zip
Remarks
We did add the following modifications:
- The
updateStatusBarnow takes two ints in order to syncrhonize with the selected item from the spreadsheet.void updateStatusBar(int, int)
Here is the implementation of this function:
void SpreadSheet::updateStatusBar(int row, int col)
{
    QString cell{"(%0, %1)"};
   cellLocation->setText(cell.arg(row+1).arg(col+1));

}
Which simply change the cellLocation text with the current cell coordinates.
-
We added the
makeConnexion()function to connect all the actions. Here is the content of the this function:void SpreadSheet::makeConnexions() { // --------- Connexion for the select all action ----/ connect(all, &QAction::triggered, spreadsheet, &QTableWidget::selectAll); // Connection for the show grid connect(showGrid, &QAction::triggered, spreadsheet, &QTableWidget::setShowGrid); //Connection for the exit button connect(exit, &QAction::triggered, this, &SpreadSheet::close); //connectting the chane of any element in the spreadsheet with the update status bar connect(spreadsheet, &QTableWidget::cellClicked, this, &SpreadSheet::updateStatusBar); }
Go Cell
Now we will add the function for the goCell action. For that, we need to create a Dialog for the user to select a cell.
We did already achieved that in Go Dialog .
If you lost that project, here are the steps to acomplish that:
-
Create a Form Class:
-
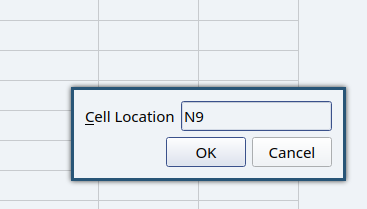
Using the designer obtain the following the form:
 Ui components of the Go Dialog.
 -
Add the regular expression validator for the
lineEdit://Validating the regular expression QRegExp regCell{"[A-Z][1-9][0-9]{0,2}"}; //Validating the regular expression ui->lineEdit->setValidator(new QRegExpValidator(regCell)); -
Add a public Getter for the line edit Text to get the cell address:
     QString GoCellDialog::cell() const
     {
         return ui->lineEdit->text();
     }
No we are setup to create the interesting connexion between the goCell action:
-
First we will create the proper slot called
goCellSlotto respond to the action trigger.private slots: void goCellSlot(); // Go to a Cell slot - connect the action to its proper slot in the
makeConnexionsfunction://Connextion between the gocell action and the gocell slot connect(goCell, &QAction::triggered, this, &SpreadSheet::goCellSlot); -
Now for the fun part. We will implement the
goCellSlot()function:void SpreadSheet::goCellSlot() { //Creating the dialog GoCellDialog D; //Executing the dialog and storing the user response auto reply = D.exec(); //Checking if the dialog is accepted if(reply == GoCellDialog::Accepted) { //Getting the cell text auto cell = D.cell(); //letter distance int row = cell[0].toLatin1() - 'A'; cell.remove(0,1); //second coordinate int col = cell.toInt(); //changing the current cell spreadsheet->setCurrentCell(row, col-1); } }
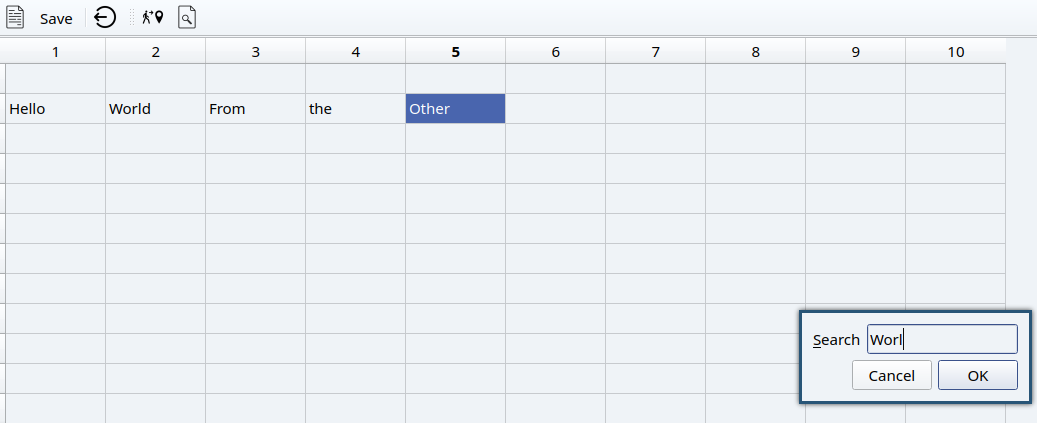
Find Dialog
We will move now for the Find dialog. This dialog prompts the user for a input and seek a cell that contains the entered text.
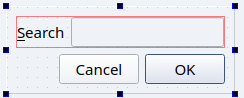
- Create a Form Class with the following ui:
- Add a Getter to obtain the searched text.
- Implements the connexion between the dialog and the find function:
Here is a set of useful information about the QTableWidget class:
- The method
rowCount()gives the number of rows. - The method
columnCount()gives the number of columns in the spreadsheet. - The Method
item(int i, int j)return a pointer on the cell indexed by i and j. -
If this pointer is not null, you could get its content by the method
text()which returns aQString. - Finally, the method to change the focused cell is
spreadsheet->setCurrentCell(int i, int j);
Saving and loading files
For our final task, we will learn how to save the content of our spreadsheet in a simple format. Since a spreadsheet is not forcefully tabular, it will be a waste to save all the empty data. Hence, we will choose a simple format that store the coordinates and the content of the non empty cells.
i1, j1, content1
i2, j2, content2
.
.
.
Saving Content
We will start by writing a private function saveContent(QSTring filename) to save the content of our spreadsheet in a text file.
-
We will add the declaration in the
headerfile:protected: void saveContent(QString filename)const; - For the implementation, we will using two classes:
- QFile which provides an interface to read and write in files.
- QTextStream for manipulating objects with a stream such as a file.
- Here is the complete implementation of this function:
 void SpreadSheet::saveContent(QString filename) const
 {

     //Gettign a pointer on the file
     QFile file(filename);

     //Openign the file
     if(file.open(QIODevice::WriteOnly))  //Opening the file in writing mode
     {
         //Initiating a stream using the file
         QTextStream out(&file);

         //loop to save all the content
         for(int i=0; i < spreadsheet->rowCount();i++)
             for(int j=0; j < spreadsheet->columnCount(); j++)
             {
                 auto cell = spreadsheet->item(i, j);

                 //Cecking if the cell is non empty
                 if(cell)
                 out << cell->row() << ", "<< cell->column() << ", " << cell->text() << endl;
             }

     }
     file.close();
 }
Save File action
Now that we have an operational saveContent function, we could focus on the
slot itself.
So first we will create a slot to respond to the action trigger in the header.
private slots:
    void saveSlot();             //Slot to save the content of the file
Now we will add the connexion in the makeConnexion function:
   //Connexion for the saveFile
   connect(save, &QAction::triggered, this, &SpreadSheet::saveSlot);
Finally for the interesting part, the implementation of the slot
void SpreadSheet::saveSlot()
{
    //Creating a file dialog to choose a file graphically
    auto dialog = new QFileDialog(this);

    //Check if the current file has a name or not
    if(currentFile == "")
    {
       currentFile = dialog->getSaveFileName(this,"choose your file");

       //Update the window title with the file name
       setWindowTitle(currentFile);
    }

   //If we have a name simply save the content
   if( currentFile != "")
   {
           saveContent(currentFile);
   }
}
Load File
Now it is your turn to write the implementation for the load file action.
That will be all for our humble application. In your free time, try to add more functionalities.
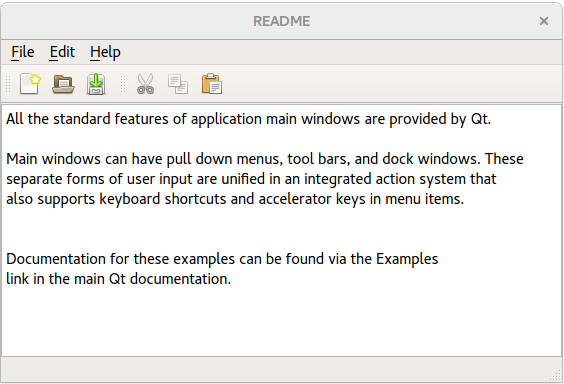
Text Editor
For your first example, we will playing the Designer for a fast application creation. The application is from Qt Examples and is a simple text editor program built around QPlainText.
We will mainly use the designer for a rapid design of it features. But if you feel adventurous you can write all in using code.
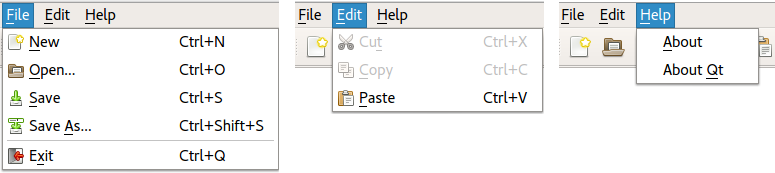
Here is an overview of the menus:
Creating the project.
First create a new project called WordText using the following steps:
- Choose a
QT Widgets Application. - Name your project
WordText - Inherit now from QMainWindow.
- Choose all the remaining default choices.
Open the form You’ll see that it has now an empty menu and already a defined menu and satatus bars.
Icons
- Add a resource file and add a set of predefined icons from you choice.
Menus
Using the designer add all the menues in the image description.
To add a menu you simply enter its name. You can edit its properties in the object Inspector.
Actions
Easy enough you can also add your actions to a menu by simply clicking the text in the menu.
Functionality
Now using your knowledge, try to code the functionality of the Text Editor. Here is a link for QPlainTextEdit.
Good luck