Rapid Dialog Design
Qt Designer
Qt is designed to pleasant and intuitive to hand-code, and it is not unusual for programmer to develop entire Qt applications pruely by writing C++ source code. Still, many programmer prefer to use a visual approach for designing forms, becaud they find it more natural and faster than hand-coding. Also they want to be able to experiment with and change design more quickly and easily than is possible with hand-coded forms.
QT designer expands the optiosn available to programmers by providing a visual capability. Qt Designer can be used to develop all or just some of an applicatin’s Forms that are created using Qt Designer end up as C++ code, so Qt Designer can be used as a conventional tool chain to imposes no special requirements on the compiler.
In the lecture, we will present the Qt Desginer capabilities and show the mecansims to incorporate its forms into a Qt project.
We will start by a simple GoDialog and then move to a more complicated
dialog with some dynamic expansion features. The third part of the lecture,
present the core of Message dialogs in Qt.
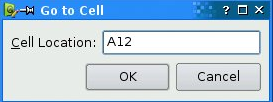
GoDialog
In this section, we will use Qt Desinger to create a Go to Cell dialog shown
in the figure:
First we, will create a single project to show a basic QDialog. This
dialog will be emtpy and it our role to fill it components using our ui
model.
The main of the project is given as follow:
#include <QApplication>
#include <QDialog>

int main(int argc, char *argv[])
{
    QApplication a(argc, argv);

    //Creating a basic dialog
    auto D = new  QDialog;

    // Showing the dialog
    D->show();

    return a.exec();
}
Now, we want to add a form that contains the widgets. So
- Select the project.
- Add new.
- Select
Qt Designer From.
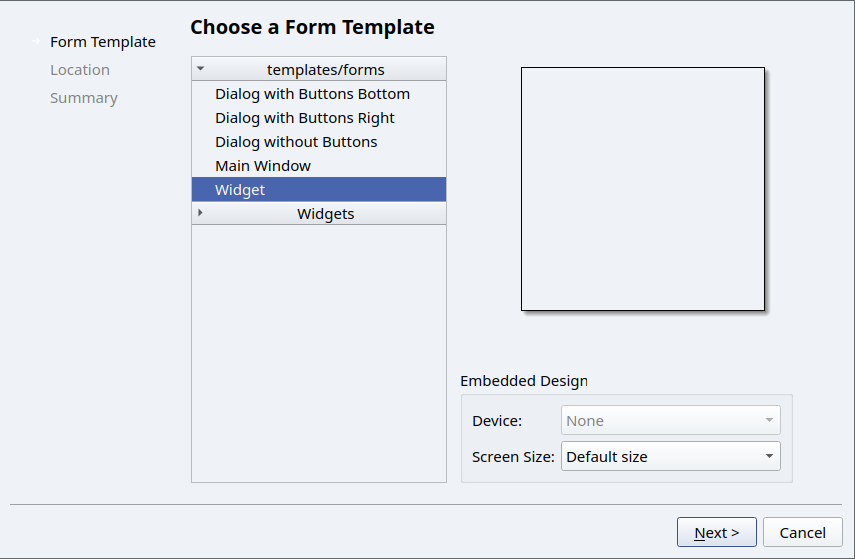
- From the select
Widget. - Name the form
godialog.ui.
Creating widgets
Using the drag and drop method, add the following components to your form:
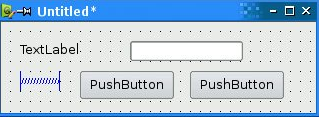
Do not spend any time positioning the widgets as you know that they will by positioned using a proper Layout.
Now, we will edit the properties of our widgets:
- Click on the label, and the Object Inspector( the window on the right)
change the following content:
ObjectName: labeltext: “&Cell Location”
- Click on the Editor and change the following:
ObjectName: lineEdit
- Click on the first button, and change:
ObjectName: okButtonenabled: falsetext: OKdefault: true
- Now for the second button:
ObjectName: cancelButtontext: cancel
- Click the form background to select the form itself.
ObjectName: GoDialogWindowTitle: To to Cell
For now, the dialog looks fine, a final touch is to associate the
label the lineEdit. In order to do that, we will click on Edit/Edits Buddies
to enter a special mode that allows you set set buddies.
Click on the label and drag the red arrow line to the line editor, then releae.
The label should show Cell location (the & should disappear).
Laying Widgets
Now it is time to lay out the widgets on the form:
- Select the
CellLocationlabel and thelineEditand select Lay Out Horizontally. - Select the
SpacertheOkButtonand thecancelButtonand click on Lay out Horizontally. - The final task, is to select the form itself and click Lay Out
Vertically.
- We want also to adjust the size to preferred size.
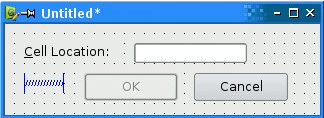
The Dialog should appear as follow:
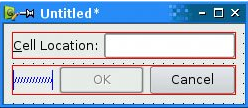
The red lines that appear on the form show the layouts that have been created.
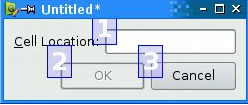
Now we can add the Tab order (order of which the widgets will be
activated by cycling the tab key). Click on Edit/Edit tab Order. A number in
a blue rectangle will appear next to each widget that can accept focus
Click on the widget until you see the order you’re looking for.
Now that we have a working a form, we will use the function setupUi(dialog) that permits to a form to register its contents in a given dialog:
Her is the modified main.cpp:
#include <QApplication>
#include <QDialog>
#include "ui_godialog.h"

int main(int argc, char *argv[])
{
    QApplication a(argc, argv);

    //Creating a basic dialog
    auto D = new  QDialog;

    //Setting the contentent of the diaglog using the form
    Ui::GoDialog ui;
    ui.setupUi(D);

    //showing the dialog
    D->show();

    return a.exec();
}
You should see the full dialog but notice the following points:
-
If you enter
Atl-Cyou will go automatically to the lineEdit (this is the result of editing the buddies). -
The
OkButton is not activated. -
Try to cycle using
Tabbutton to see the order of the buttons.
(Optional IA, CS) Subclassing Forms
We can make the dialog function properly by writing some code. The cleanest
way is to create a new class that inherits both Qdialog and
Ui::GoDialog and that implement the missing functionality.
We will create a new class called GoCellDialog with the following header
file:
#ifndef GOCELLDIALOG_H
#define GOCELLDIALOG_H
#include <QDialog>
#include "ui_godialog.h"


//Multiple Inheritance (could be simply replaced by composition)
class GoCellDialog : public QDialog, public Ui::GoDialog
{
public:
    GoCellDialog( QWidget *parent=nullptr);

 private slots:
 //Automatic slot for the textChanged signal
    void on_lineEdit_textChanged();
};

#endif // GOCELLDIALOG_H
And here the implementation for the GoCellDialog.cpp:
#include "gocelldialog.h"
#include <QRegExpValidator>

GoCellDialog::GoCellDialog( QWidget *parent): QDialog(parent)
{
    //Setting the ui
    setupUi(this);       // Drawback Im a form and QDialog in the same time


    //Connection
    connect(okButton, &QPushButton::clicked, this, &QDialog::accept);
    connect(cancelButton, &QPushButton::clicked, this, &QDialog::reject);


    //regular Expression for the lineEdit (letter, digit, digit)
    QRegExp reg{"[a-zA-Z][0-9][0-9]{0,2}"};

    lineEdit->setValidator(new QRegExpValidator(reg, this));

}

void GoCellDialog::on_lineEdit_textChanged()
{
    //Activate the button if the input is validated
    okButton->setEnabled(lineEdit->hasAcceptableInput());
}
In the code below we used the following points:
-
QRegExp is store a regular expression in order to accept only value that could refer to a valid cell.
-
Once we defined our regular expression, we set
Validatorfor the line Edit using the previous regular expression. -
We also connected the
okandcancelbuttons to the default slotsacceptandrejecton the Dialog class. -
A final point, is the use of Automatic signal connexion similar to
Javamechanism.
on_objectname_signal
will connect automatically to the special signal of the objectName.
For our example on_lineEdit_textChange, this slot will be triggered each time
the text of the lineEdit changes.
Nested Layout (revisited)
Now we will consider the example nestedLayout in the layout lab:
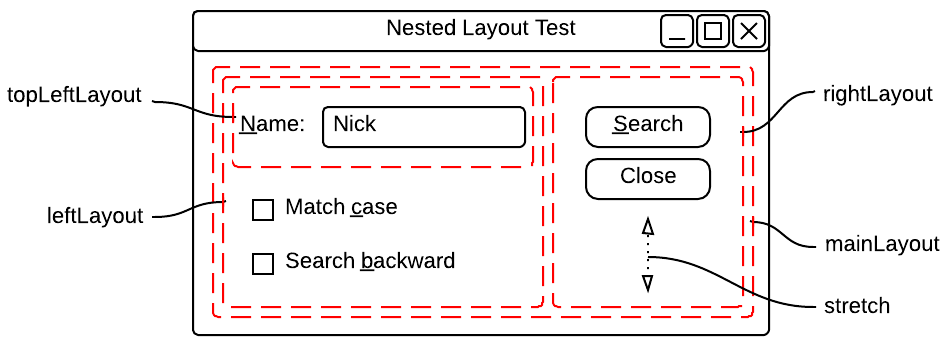
Now it is you turn to complete that form using the designer.
Here is the steps that you should respect:
-
In the same project, create a new
Qt Designer Form Class, This will have both the ui files and the class files.cppand.h. -
Name you class
SearchDialogand make it inherit from QDialog. - Place the widgets and lay them correctly.
- Make the label a buddy of the lineedit.
- Choose your tab order.
- Save and show the dialog in the main function.
- (Optinal): make the line edit accepts only names with three to seven letters.
MessageDialog
QMessageBox is a commonly used modal dialog to display some informational message and optionally ask the user to respond by clickign any one the standad button on it. Each standar button has a predefined caption, a role and return a predifined hexadecimal number.
We will learn how to show some basic predefined messages that inherits from the QMessageBox.
About
Let continue on our same project, and add simple form with a single button to trigger the about message.
- Add your first button with the following properties:
ObjectName: aboutButtonText: &About
A fast way to define your automatic slot for a given signal is to:
- select the button.
- select
go to slots - Choose the
clicked()signal.
This will create an automatic function called:
void on_aboutButton_clicked()
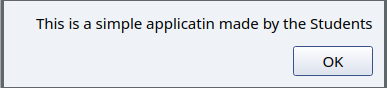
Fill this function with a about dialog that show information about you
application.
void Messages::on_aboutButton_clicked()
{

    //Use of the message about
    QMessageBox::about(this, "About Message","This is a simple applicatin made by the Students");
}
About Qt
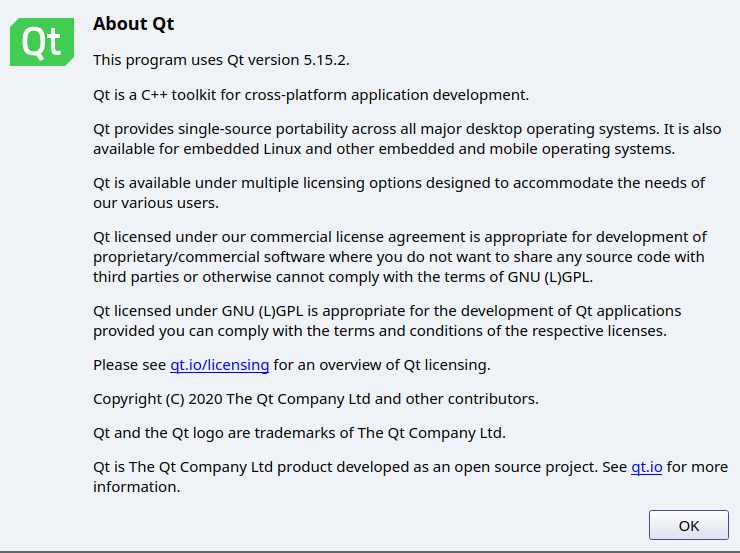
Now we move on, to another about dialog that show your Qt installation information.
- Add a second button called
aboutQtButton. - On his
slotadd the following code to show the information about you Qt:
void Messages::on_aboutQtButton_clicked()
{
   QMessageBox::aboutQt(this, "Your Qt");
}
Critial
We will add a third button, to show these types of messages:
-
QMessageBox::critical(parent, title, Message)to show a message informing of a denger area or error. -
QMessageBox::information(parent, title, message)similar to critial but with an friendly icon to show a normal information.
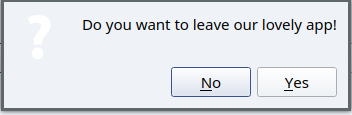
Question
The third and intersting Message is an question message.
Imagine when you want to quit an running up that could be processing important files on you computer, a good application should ask you to confirm before exiting the app.
Let’s createa new button and name it Quit. This button should:
- Show a dialog to the user asking him if he want to leave.
- If the user click on the
YesButton, the application shouldexit. - Otherwise, the application show a thanks message for continuing using the app.
So in the custom slot for this button add the following code:
void Messages::on_critialButton_clicked()
{
 auto reply = QMessageBox::question(this, "Exit dialog",
 "Do you want to leave our lovely app!")
}
This function return STandardButton containing the result of the user.
For our example if we want to know if the user clicked yes or no and act
accordingly, we will add the following code:
//User clicked to yes
if (reply == QMessgeBox::Yes)
    qApp.exit();

else {  //user clicked to no

    QMessgeBox::information(this, "Thanks",
    "Thank you for using our app");
}
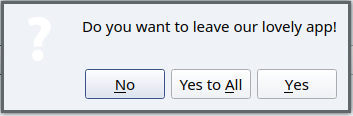
Another intersting question is what is we need more answers, like
YesToAll?
QMessageBox::question offer a fourth argument that specify the set of answers
to pop up to the user. For example, if want three response such as:
- Yes
- No
- YestoAll
we will create the Dialog as follow:
    auto reply = QMessageBox::question(this, "Exit dialog",
                                       "Do you want to leave our lovely app!",
                                       QMessageBox::Yes | QMessageBox::No | QMessageBox::YesAll);
This will bring the following dialog:
Wrap up
In this lecture, we showed how to use the QT Desinger for rapid dialog and
UI design. We illustrated its use with a simple form and show how to incoroprate
the content of a ui form into a dialog using either simple syntax or the
Inheritance. The last section focused on the class QMessageBox to get simple
information from the user such as a yes or no.
Next we will dive deeper into creating a fully featured application. Stay tuned.