Signal and Slots
Implements your first Gui Interactive Widget.
Calculator
This exercise follows up to add interactive functionality to the
calculator widgets written in the previous homework. The goal is to use Signals and Slots to simulate a basic calculator behavior. The supported operations are *, +, -, /.
Setup
In the starter project Callcultaor.zip . You’ll find a Qt project to that create the main widget as a custom class.
-
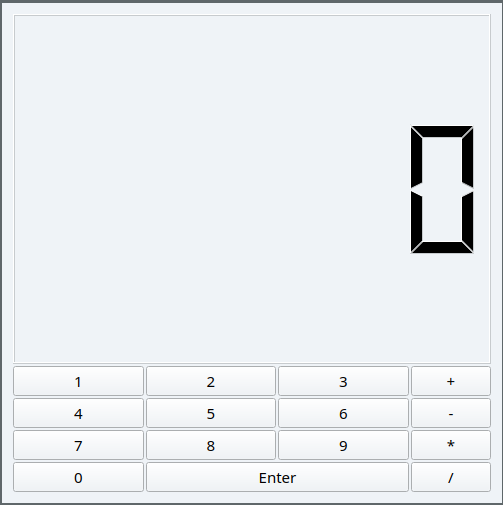
Configure and Run the project. You should see a main widget with the calculator buttons.
-
Investigate the header file
calculator.hto get a clear idea about the *attributes** of the class. -
You should special attention to the following attributes:
QVector<QPushButton*> digitswhich store a pointer to each digit.QVector<QPUshButton*> opertionssame but for the operations buttons.QPushButton *enterthe enter button.
For now our application has no reactivity. The goal of the rest of the section is to obtain
step/stepa fully functional widget.
In order to have a computing functionality, we will represent any mathematical operation by:
left (op) right
where (op) is one of the following allowed operation + - * /.
Hence we will add the following private members to our class calculator.h.
private:
    int * left;          //left operand
    int * right;         // right operand
    QString *operation;  // Pointer on the current operation
Custom Slots
Our first step is to respond to each digit click. But here we face a classical problem which to map multiple signals to the same slot. The slot has to behave differently according the which digit was pressed. This problem is thoroughly investigated in J.Blanchette Blog.
The trivial solution is to create a slot for each button, but that will be cumbersome.
public slots:
        void button0Clicked();
        void button1Clicked();
        ...
        void button9Clicked();
Custom Slot.
For our case, we will use the Sender approach which allow a slot to get the identity of the sender object. From that we could get which button was clicked. Hence we will define only one slot such as:
public slots:
   void newDigit();
Digits Interaction
The idea of this new connexion, it to connect all the button to this slot.
This function will use the Sender method to get the identity of which button
was clicked and act accordingly.
-
Hence we will add the connect the connect all the digits buttons to this slot.
//Connecting the digits for(int i=0; i <10; i++) connect(digits[i], &QPushButton::clicked, this, &Calculator::newDigit); -
Now, we will implement the
newDigitslot to show the digit in theLCDNumber.//Getting the identity of the button using dynamic_cast auto button = dynamic_cast<QPushButton*>(sender()); // Each button has his own digit in the text auto value = button->text()->toInt(); //Displaying the digit disp->display(value);
Now each time, you will click on a button, his digit will be shown in the LCDNumber.
Make sure this step is working as it is the crucial part in the project.
Integer numbers
Now that we can react to each digit, it is time to correctly implement the
newDigit slot. We should clarify two points to clearly understand the
implementation:
- Which number, should be constructing
leftorrightThe response to this question is easy, If we have an operation, then we already have our left operand and we should focus on the right.
- How to add digit to an existing number.
Suppose we are working on left = 43. What should happen if we clicked the digit 2. Simply we should move all digit by one digit (x10) and then add the 2. Programmatically speeaking this could done by :
*left = (*left) * 10 + digit
Here is the full implementation of this function using the mentioned details:
void Calculator::newDigit( )
{
    //getting the sender
    auto button = dynamic_cast<QPushButton*>(sender());

    //getting the value
    int value = button->text().toInt();

    //Check if we have an operation defined
    if(operation)
    {
        //check if we have a value or not
        if(!right)
            right = new int{value};
        else
            *right = 10 * (*right) + value;

        disp->display(*right);

    }
    else
    {
        if(!left)
            left = new int{value};
        else
            *left = 10 * (*left) + value;

        disp->display(*left);
    }
}
Test your application with this code, you should see you number forming by clicking on the digits.
Operation Interaction
Now we will move on the operation of the four buttons. We will the same
mechanism using the sender method. Hence we will define a single slot to
handle the click on the operations buttons:
public slots:
    void changeOperation();  //Slot to handle the click on operations
    void newDigit();
This slot will simply execute the following operations:
- Get the identity of the sender button.
- Store the clicked operation.
- Reset the display to 0
void Calculator::changeOperation()
{
    //Getting the sender button
    auto button = dynamic_cast<QPushButton*>(sender());

    //Storing the operation
    operation = new QString{button->text()};

    //Initiating the right button
    right = new int{0};

    //reseting the display
    disp->display(0);
}
Enter Button
The final touch is left to you, You should implement the slot for the enter
button to compute the result of combining the left and right value according
to the operation.!!
Enhancements
Our calculator is quite basic, you could enhance his capabilities by:
- Adding the reset button (C).
- Adding the three or more operand such as (24 * 23 + 23)!
- Add a set of operations ( Left that to your creativity!)
Traffic Light
In this exercise, we will use the QTimer to simulate a traffic light.

-
Download the starter code TrafficLight.zip
-
Investigate the code in order to underhand each component of the
TrafficLightclass. -
Your task is add some functions in order to change each 3 sedonds in the following order:
Red -> Green -> Yellow
Happy coding!